The difficulty in long-term backpacking photography is always going to be packing the right kit. In a kit list designed to take us through 18 months of independent travel, how much kit is too much? I thought I would share my take on independent traveling with backpacking photography equipment, in case it’s useful to anyone else considering long-term travelling with camera kit.
The First Attempt
Our month-long trip to Costa Rica allowed the chance of a dry-run in terms of what was going to be used and what was superfluous. My kit consisted of my first and only DSLR, a Canon 20D, having moved from my 1981 Olympus OLM1 and Velvia slide film purely due to the rising cost of developing film. The trip was a mixture of shooting family events and the wonderful nature & scenery Costa Rica has on offer.
My lens collection was:
- Canon EF 28mm f1.8
- Canon EF 75-300mm f4/5.6
- Canon EF-S 10-22mm f3.5-4.5
The setup performed well; the 20D is a work-horse which is undeterred by conditions, working just as well in the heat & humidity of Costa Rica’s cloud forest as it has in freezing alpine environments in the past. A 10-22mm lens is ideal for most landscape work, being designed to work on the 20D’s cropped frame CCD. The only difficulty came when shooting with the long lens in the forests surrounding Tortuguero, with its many monkeys, birds and other beautiful wildlife moving amongst the dark canopy. Some well-shot images weren’t captured as well as they might have been.
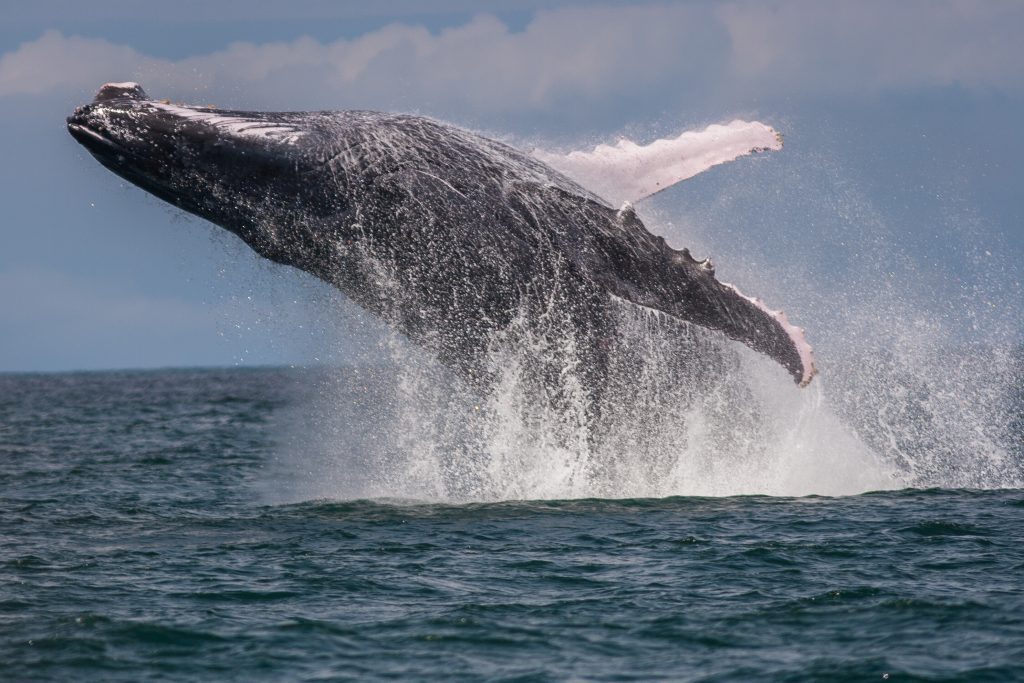
On a day out looking for whales near Jaco, my cousin Matthew lent me his L-series 300mm lens; the difference was astounding. The ability to shoot at shutter speeds that would make you nervous on a 50mm lens, yet turning out clean, crisp images completely explains why these lenses are respected so widely. It was clear, I had to get myself one of those!
Rethinking the Setup
Having returned to the UK and basing ourselves in North Wales, I continued to shoot landscape and wildlife, as much as the weather allowed. I bought a 2nd hand L-Series EF 70-300mm IS USM lens from the very talented James at Life out There Photography, which is a much more justifiable lens for travel, over the cheaper fixed-focal-length versions.
I also considered the lifespan of my 15 year-old 20D camera and estimated it had over 150k shutter releases. Canon are good, but that makes it fairly geriatric in camera terms! So reluctantly, it was relegated from the trip in favour of an EOS 7D mk2.
I have always used battery grips in my cameras, even back in the OM-1 days. The flexibility of an additional shutter release when shooting in portrait, as well as not having to worry about battery life on a long day out, meant that I purchased a new battery grip for the 7D, purely because this is the setup I’m used to.
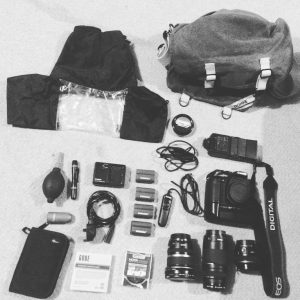
A good friend, John Houlihan of WitnessPhotography recommended Domke camera bags to me several years ago; his collection, some of which have seen several dacades’ use, is testimony to their rugged nature whilst being fairly low-key. This ‘camouflage’ along with their adaptable nature makes them perfect for travel photographers looking for quality bags which don’t shout ‘camera’. For a single SLR body setup, the Domke F6 bag is ideal for this trip. The F6 has plenty of room for my setup, plus some day-to-day items too; so there’s no need to bring another bag, even when carrying all your camera kit. It’s also about the heaviest working weight I’d like to carry for a whole day shoot if you have to cover a lot of ground.
My full setup at the beginning of the next leg of our trip consisted of:
- Canon EOS 7D mk2
- Canon BG-6 battery grip & 4 batteries
- Canon EF 28mm f1.8
- Canon EF 75-300mm f4/5.6
- Canon EF-S 10-22mm f3.5-4.5
- Gobe circular polariser filters for each lens
- Domke F6 camera bag
- Hama remote shutter release
- Micro tripod
- Simple top-mount flash & diffuser
- 4 lens cloths & a microfibre cleaning cloth
- Lens cleaning pen/brush
- Brush blower
- Waterproof camera cover
You’ll note the number of cleaning items in the list, this is one area not to skimp on when packing your kit. You are going to come across every single thing your camera doesn’t like; dust, sand, humidity, freak downpours and sweat, and whilst you’re backpacking, you won’t always be able to avoid these or shelter properly. Be prepared to deal with keeping your kit in top condition in less than ideal circumstances. It probably goes without saying, but a simple UV or protective filter on every lens is a must too!
The final piece in the arsenal is a clear-backed waterproof shooting case, which protects everything but the front of the lens from water or other contaminants. I bought ours with photographing the Indian festival of Holi in mind, where revellers throw colourful ‘paint’ powder and water; an ideal photography subject, not so great for your camera! The cover has come in handy on a number of other occasions though, and so come highly recommended.
what’s the verdict? Did I get it right?
If course not! There are things I got right, and some that I got wrong. The EOS 7D is a great camera and was the right choice, despite its increased temperamental nature in hot, humid conditions where the 20D would have had no issues at all. For anyone looking for a complete workhorse camera, you could also consider the Canon EOS 60D as an alternative, with its renowned durability and updated features over the old 20D, which is something of a relic these days.
Equally, a super-wide angle lens like the EF 10-22mm, which is coping well with everything I throw at it, is super-useful when looking at landscape shots like those we saw in Hampi, or for architecture and interior photography. The L-Series EF 70-300mm has been a revelation. I would be convinced to spend the extra for L-Series on any new lenses in the future as not only is the quality of images taken with this lens super-high, but the lens feels robust, like it will still be with me in my kit in twenty years’ time.
As mentioned above, I can’t speak highly enough of Domke bags. The F6 is perfect for my setup, but there are bags of all sizes in the range. With a new range of ‘Next Generation’ bags released this year, there’s now even more choice to suit every taste and need. Personally, I go for the canvas finish ‘Ruggedwear’ bags which come with re-proofing wax, allowing you to keep on top of the bag’s waterproofing. I have been completely soaked whilst out with my F6 and not a drop of water made it into the bag.
So what did I get wrong?
Firstly, having a battery grip has been a habit for over fifteen years, it just seems natural. However, when weight and bulk is so important, I would argue that it’s an unnecessary extra. It also draws attention to your camera, which isn’t always ideal. As modern DSLRs are more efficient in terms of battery usage, I would recommend ditching the battery grip, but investing in some new batteries ahead of your trip. I bought four Duracel replacement batteries for £15 each which work really well with the camera and last for several days’ shooting at a time.
The obvious gap in my setup is between the 10-22mm and the 70-300mm lenses. The 28mm f1.8 is a brilliant lens, excellent in low light and very close to a traditional 50mm perspective when used on a cropped sensor camera. This was the first thing I bought when I moved to using digital cameras in 2008, and I love the crispness of the images it produces and the control I have over the depth of field in my images. As sad as I would be not to have this lens in my bag, if I could pack again, I would invest in something like the Canon EF 24-70mm f2.8L USM. The focal-range available would more than make up for the loss of a single f-stop.
I have never been a user of flash, except when forced into the darkest of indoor celebrations or for specific flash-effect outdoor images, preferring to work with the available light instead, ideally natural. So to be carrying a flash-gun and diffuser seems like unnecessary bulk for someone unlikely to use it more than a couple of times. This is a really personal point of view of course, and for some people a flash would be a well-used accessory. If you are thinking of bringing a flash, I would recommend having a remote option for use in lighting ruins, balancing shadows or any number of indoor needs.
What about editing & storage?
By far the most reliable machine for any creative work is a Mac. We use a 13 inch MacBook Air; its bulkier and heavier than the smaller version, but I couldn’t deal with a smaller screen when working on photo editing or other digital projects. Having moved from a 27 inch iMac, I already feel like I need a trip to the optician after only a few weeks! Whilst looking for a case for the MacBook, I came across a review on Amazon which complained that it made the person’s Mac look cheap. That was enough for me, a ‘cheap’ looking case and neoprene sleeve was mine for £14. Not the most fair-trade purchase, but it hides and protects the MacBook perfectly.
The downside to any Apple product is their reliance on a solid internet connection. iCloud is brilliant in theory, an inexpensive cloud storage & backup solution designed to work with your machine. The reality of backpacking is that solid internet connections of any great speed are going to be few and far between, which can leave you with an ever increasing backlog of data to upload and exposed to not having actually backed up your precious images.
Having said that, in India, the fast 4G mobile networks with abundant, cheap data packages make it an easy place to work digitally. Mobile SIM packages are available with 1-2GB of data per day for around £4-6 per quarter. The fastest network is the new Jio brand, but coverage is less reliable outside urban areas. Vodafone & Airtel are the market leaders, with better overall network coverage. I have heard it said that Vodafone performs better in the south of India, whilst Airtel is much better than any alternative in the North. We have Jio SIMs running in iPhones which make excellent mobile hotspots, plenty good enough to run anything the MacBook needs quickly and reliably.
The best bet in our experience however, is to create redundancy through backing the whole Mac up to a remote hard-drive which you can hide somewhere in your main rucksack. That way, if your Mac is stolen, the hard-drive is likely to be in a different bag. The second backup would be to bring enough SD or Compact Flash cards that you don’t need to wipe them when full. You could even post them home so they are separate to all of your travelling kit. Remember though, your Lightroom edits will be lost unless you have a backup of your catalogue files, the camera’s cards only hold the original images.
In terms of editing software, we are running the full Adobe Creative Suite, because we use the different software packages in the digital marketing side of what we do. Most of our photography work is done in Lightroom, with very little re-touching done to the images. To avoid paying the full price of Creative Cloud suite, Adobe also offer their collection of Lightroom & Photoshop as an affordable package aimed solely at photographers.
Adobe, like Apple, are moving to a much more cloud-based system which has some amazing features, yet is largely impractical for backpacking photographers for the reasons mentioned above. Thankfully they have retained the original versions of the software with full support and a commitment to continue development, naming them the slightly drab ‘classic’ versions. I would recommend anyone looking at remote backpacking photography anywhere with a less than ideal internet connection stick with these Classic versions, to avoid any frustrating issues accessing or saving large image catalogues or files.
Carrying Backpacking Photography Kit
This is always going to be a personal choice, but it’s the crux of long-term backpacking. The most important thing when travelling is that you are comfortable moving with your kit; in my experience your choice of pack(s) is the most important thing here. I am still using the same rucksack I have had for sixteen years, which was bought for mountaineering trips to the Alps as well as backpacking. Buying and fitting packs is probably a full blog in its own right (watch this space!) but suffice to say a good quality, well fitting pack is an investment you will never regret.
Seeing that your camera kit and laptop are probably the most expensive things you will have on your trip (if not, re-assess your choices; never bring anything you wouldn’t be happy to replace if lost), you will want them with you almost all the time, especially when moving between destinations where your main bag might be on the roof of a bus or rickshaw, or being thrown around by baggage handlers.
Assuming that you have a comfortable backpack that you can carry easily, many people opt for a second ‘day pack’ which they will also use day-to-day when not moving between places with all their gear. I opted for a 25ltr Patagonia Black Hole Pack. This durable and water-resistant bag is comfortable when worn on the front (when carrying my main bag too) and is big enough to carry all my lenses, camera, laptop, cables, first aid kit, journal, a book and assorted bits and bobs needed whilst on a train or bus. With a dedicated suspended laptop sleeve, it protects the MacBook really well, whilst the removable Domke lens compartment fits nicely in the bottom of the bag, with the camera body and kit wrapped in the rest of the bag.
Whilst it might be easier to have a bigger camera bag in the first place, I find that this setup gives you a simple two-bag solution, but allowing you to switch back to the dedicated, smaller camera bag once you reach your destination. The day-pack also comes into its own if you are looking at hiking into an area to take photos, allowing you some extra items (hammock & mozzy net for example) as well as the comfort of rucksack straps in rough terrain.
Of course there are dedicated rucksack style camera bags from brands like Lowepro, and whilst I don’t find them as durable or comfortable as dedicated hiking/mountain bags, they are certainly to be considered as an alternative to my suggestions above.
Insuring your Camera Kit
Having trawled the internet looking for the right policy, and comparing including it on our standard travel insurance versus having a separate policy, I went with a policy from Photoguard.
They have a terrible website, but well-reviewed cover and claims. Insuring all of my kit, plus Bex’s Canon G1 bridge camera and the MacBook was £300 for twelve months, including ‘breakdown’ cover on the Mac. I changed a couple of items on the policy before we left for India, and their communication was quick, helpful and professional.
The NOMAD Backpacking Photography Bag
 We have put together links to the backpacking photography kit we use, including independent reviews if possible. Many items can confidently be bought second hand.
There are some great groups out there where you can be confident in what you’re buying, such as the UK Photography Equipment for Sale Facebook group. I’m sure other trustworthy groups exist, in the UK and elsewhere, but we have found this one to be really good; you can place wanted ads too, with users happy to comment and advise if you say what you’re looking for & why.
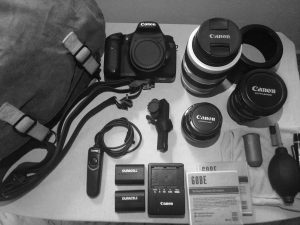
Our Kit:
- Canon EOS 7D mk2 | Review
- 4 Duracell replacement batteries
- Canon EF 28mm f1.8 | Review
- Canon EF 70-300mm f4/5.6L IS USM | Review
- Canon EF-S 10-22mm f3.5-4.5 | Review
- Gobe circular polarising filters for each lens (we use the Japan Optics versions)
- Domke F6 camera bag | Review
- Hama remote shutter release
- Micro tripod
- 4 lens cloths & a microfibre cleaning cloth
- Brush blower
- Waterproof camera cover
I hope this blog is useful for anyone planning to pack for travel photography whilst backpacking. Please feel free to use the comments section to add your own ideas for the ideal kit or to ask any questions, I’ll be happy to answer anything I can.